

How a House
Gets Built
The complete 12-step guide to building a home in Karnataka — explained in plain language, with no construction jargon. From your first site visit to the day you receive your keys.
12
Steps Explained
6–12
Months Timeline
0
Jargon Used
Step 1 of 12
Plot Selection & Title Check
Is your ground legally and physically solid?
Buying a plot is the foundation of your journey. In Shivamogga and Davanagere, plot dimensions (30×40, 40×60) and road access are critical factors. A "Clean Title" means the seller legally owns it, and the government recognises their ownership.
Action Checklist
Sturdy Pro Tip
Corner plots offer dual vistas but may have higher setback requirements from the city corporation. Always verify the local building bye-laws first.
Cost Indicator
Legal charges: ₹10,000–₹30,000
Step 1
Plot Selection & Title Check
Step 2 of 12
Soil Testing
A health check for the Earth beneath your home.
Before we build, we test the ground to determine how much weight it can safely carry. This critical step prevents cracks and sinking years later. In Shimoga, soil can vary wildly — from solid rock to soft silt — across just a few metres.
"Just like a doctor orders blood tests before surgery, we test the ground before building. Skipping this is the #1 cause of structural failure in low-cost buildings."
₹8,000–₹15,000
Typical Cost
3–5 Days
Time Required
Geo-Tech Report
Report Type
Step 3 of 12
Architectural Design & Vastu
Turning dreams into precise, buildable blueprints.
The design process starts with your Floor Plan — a precise 2D layout of every room, door, window, and staircase. This is not just a drawing: your floor plan is what we use to calculate your actual project cost. Until the floor plan is finalised, only a tentative estimate can be shared — accurate costing requires knowing the exact Built-Up Area and room configuration.
Once you approve the floor plan, we move to the 3D Elevation — a photorealistic rendering of how your home will look from the outside. At Sturdy Groups, every plan integrates Vastu compliance (East/North-facing preferences) to ensure your home attracts both light and positive energy.
BUA
Built-Up Area — the total measured floor space
Carpet Area
The actual inner floor space you walk on
Vastu
Ancient directional science for home harmony
FSI
Floor Space Index — how much you can build on a plot
Sturdy Pro Tip
Always request a 3D walkthrough rendering before finalising your plan. Changing a wall on paper costs nothing — changing it after pouring concrete costs a fortune.
Cost Indicator
Floor Plans: Starting from ₹15,000 onwards · 3D Elevation: Starting from ₹30,000 onwards
Step 3
Architectural Design & Vastu
Step 4 of 12
Government Building Permits
Getting the official green light from the City.
SMC (Shivamogga Municipal Council) or DCC (Davanagere City Corporation) must formally approve your building plan. Without this license, your construction is illegal and cannot be sold or registered. Sturdy Groups manages this 100% on your behalf.
Action Checklist
Never start construction before receiving your approved permit. Illegal structures can be demolished by the municipality and cannot be resold or get bank loans.
Cost Indicator
Depends on plot size, zone & FSI used
Step 4
Government Building Permits
Step 5 of 12
Excavation & Foundation
Planting the roots of your home into the earth.
We dig the ground to prepare for the structural footings — the "feet" of the building. The footing type (Isolated vs. Raft vs. Pile) is chosen based on your Step 2 soil report. Footings are crucial for stability during monsoons, tremors, and wind.
All excavation depth, footing dimensions, and reinforcement details are executed strictly as per the approved structural drawings provided by our engineering team. No dimension is guessed — every measurement on site matches the stamped structural drawing.
Sturdy Pro Tip
Digging depth is typically 4–6 feet for G+1 residential homes. In high-rainfall Malnad zones like Shivamogga, waterproofing the foundation base is highly recommended.
Comparison Guide
Isolated Footing
Normal soil — most common in residential
Raft Foundation
Weak or waterlogged soil — one solid slab
Pile Foundation
Very soft ground — columns drilled deep
Cost Indicator
Varies by plot & soil conditions
Step 6 of 12
Columns, Beams & Slabs (RCC)
Building the skeleton that holds everything up.
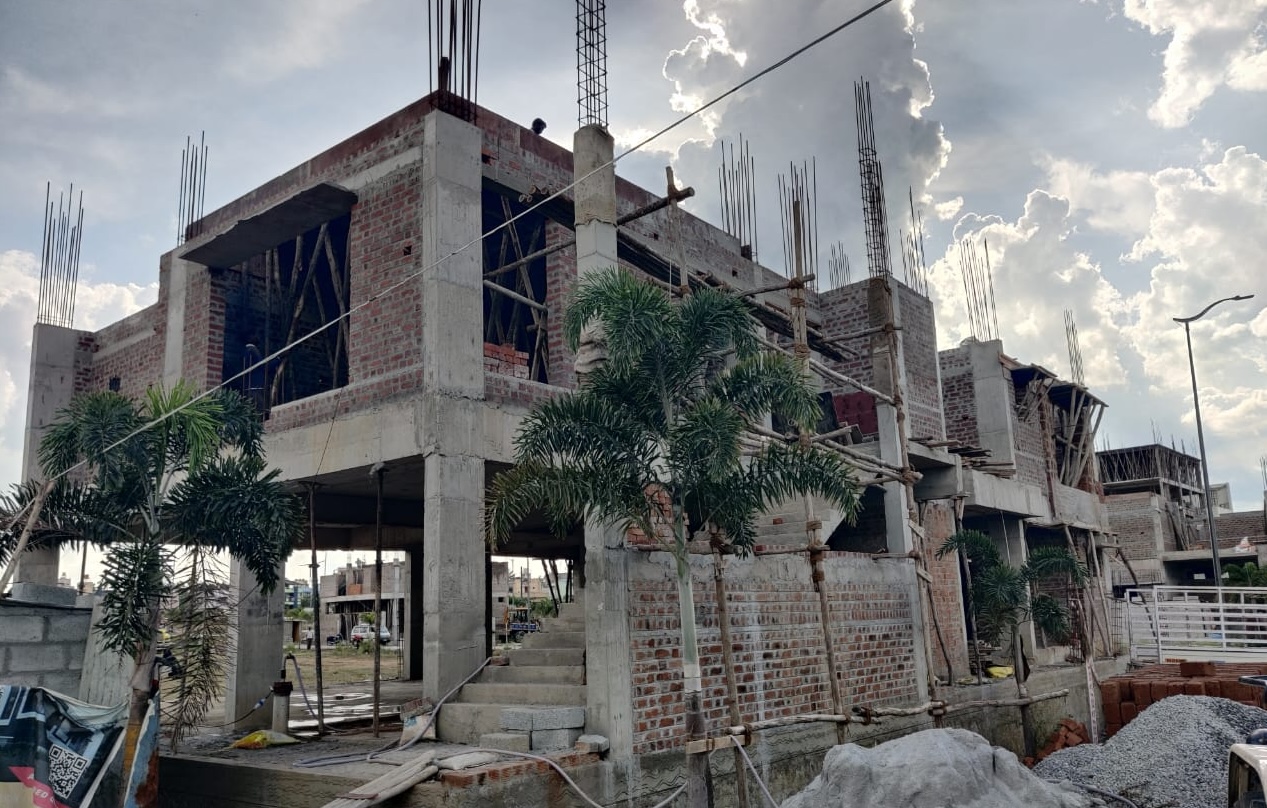
This is the RCC (Reinforced Cement Concrete) structure — the most critical phase for structural safety. Columns carry vertical loads, Beams connect and distribute them horizontally, and Slabs form your floors. The quality of steel and concrete used here determines your building's 50-year lifespan.
"Think of it like the human body: Columns are your leg bones, Beams are your spine, and Slabs are your floors. Compromise here and everything above suffers."
Materials We Manage
TMT Steel
Tata Tiscon, JSW Steel
Fe 500DCement
UltraTech, Dalmia Bharat
M20 / M25Aggregate
River Sand + Stone Chips
20mm & 40mmCost Indicator
Accounts for 35–40% of total project cost
Step 7 of 12
Masonry & Brickwork
Filling the steel skeleton with solid walls.
Once the structure is ready, we build the walls using bricks or blocks. In Karnataka, three main options exist — each with specific advantages for heat insulation, construction speed, and cost. We help you choose the right wall for each part of your home.
Sturdy Pro Tip
AAC (Autoclaved Aerated Concrete) blocks keep homes significantly cooler in Bangalore's summer heat — a smart upgrade that pays for itself in reduced AC costs.
Comparison Guide
Red Brick
Strength, tradition & great thermal mass
AAC Block
Lightweight, fire-resistant & fast to lay
Solid Block
Most cost-effective for boundary walls
Step 8 of 12
Plumbing & Electrical (MEP)
The hidden nervous system of your home.
Wires and pipes are laid inside walls and floors BEFORE plastering. This is your only chance to finalise every plug point, tap, switch, and drain location. Changes after plastering require walls to be broken — messy, expensive, and avoidable.
Action Checklist
Take photos of every pipe and wire route BEFORE plastering begins. These photos will save you thousands in future repairs when you need to run a new wire or fix a leak.
Cost Indicator
MEP typically ₹150–₹250 per sq.ft
Step 8
Plumbing & Electrical (MEP)
Step 9 of 12
Plastering & Waterproofing
Smoothing surfaces and making them rain-proof.
Internal walls get 2 coats of cement plaster for a smooth painting surface. External walls get a thicker coat. Waterproofing is applied to all wet areas — bathrooms, kitchen slab, terrace, and external walls — to stop dampness from entering the structure.
In high-rainfall Shivamogga (Malnad region), external waterproofing is absolutely non-negotiable. Skipping it is the single biggest cause of wall dampness and fungus in homes built before 2010.
2 Minimum
Plaster Coats
Toilets + Terrace + Walls
Waterproof Areas
21 Days Minimum
Curing Period
Step 10 of 12
Flooring & Painting
Adding colour, texture and warmth to every surface.
Flooring and painting define the visual character of your home. From Vitrified tiles to Italian Marble, each choice creates a different feel. Painting uses 2 coats of wall putty for smoothness, 1 primer coat, and 2 coats of final emulsion for longevity.
Sturdy Pro Tip
Choose Weathercoat or Apex Ultima for external walls — not regular paint. Normal paint peels off within 2 monsoon seasons. Weathercoat lasts 10+ years with UV and washability protection.
Comparison Guide
Vitrified Tiles
Bedrooms, pooja rooms & corridors
Granite
Stairs, kitchen counter & sit-out
Italian Marble
Premium living rooms & master bedroom
Cost Indicator
Flooring: ₹80–₹300/sq.ft. Painting: ₹30–₹60/sq.ft
Step 11 of 12
Doors, Windows & Fixtures
Securing your space and adding final character.
Main door in Solid Teak wood for security and prestige. Internal doors in WPC (termite-proof & waterproof). Windows in Aluminium or uPVC frames with glass for light. This phase also includes fitting of light switches, taps, sanitary-ware, and bathroom accessories.
Sturdy Pro Tip
Invest in a heavy, quality main door lock. Door brands like Godrej and Yale offer anti-theft, pick-resistant locks. A ₹5,000 lock investment on a ₹1Cr home is the best ROI you'll ever get.
Materials We Manage
Main Door
Solid Teak Wood
5 inch frameInternal Doors
WPC / Flush with veneer
4.5 inch frameWindows
Aluminium or uPVC
Double-track, 3mm glassStep 12 of 12
Inspection & Handover
The final quality check before you receive your keys.
Our 150-point quality inspection ensures zero leaks, perfect floor levels, smooth finishes, and every switch and tap functions correctly. Only after clearing this checklist do we hand over your keys along with the 10-year structural warranty and post-handover support plan.
Action Checklist
Sturdy Pro Tip
Your handover package includes: Approved building plan, all bills/receipts, site photo log, material test reports, warranty certificates, and the home maintenance guide. Insist on getting all of these.
What You Receive at Handover
You Now Know More Than
90% of Homeowners.
You've read the guide. Now let's talk about your specific plot, budget, and timeline. Our experts are ready to take you through your personalised 12-step journey.